Craig is such an amazingly sweet man... he picks flowers for me practically everywhere we go so needles to say... I have a lot of pressed flowers! Books are great for pressing the flowers; each page can hold at least one flower and then they can sit on top of paper towels holding more, but I want to be able to see them!
Inspiration hit one day while perusing Kirkland's... I saw a stack of picture frames that screamed "Your pressed flowers would look great in me!" So, I am somewhat sorry to the creator of this once original and now mass produced picture... I am taking two and taking them apart because I like the frame. If you too have a bunch of pressed flowers or a sweet someone who likes to pick them, here's a simple way to display them:
Step 1: Make or simply find a frame like I did...

Step 2: Remove the picture insert...
Find the picture insert on the back with your finger. You will feel a ridge unless you can see it. Use an exacto knife, pocket knife, or really sharp pair of scissors (all with extreme care and/or supervision of course) to cut along the ridge on the back. If you cut carefully along only three sides of the picture, your backing will look more like it was professionally done (see below). If you have metal tabs or staples holding the picture in place, use a flat head screw driver to bend them away from the picture until the picture can be removed.

If you want to change the background paper, scrapbook paper can be perfect because you can choose the color or design you want. Lay the paper you want to use, color side down. Spray the picture from your frame with a simple craft adhesive (read the container for safety purposes), which will leave a smooth finish. Lay the picture from your frame that you no longer want adhesive side down on top of the back of your new paper (see below left). When it's dry to the touch, you are ready to cut along the edges of the old picture. If you're worried about the edges not being perfect, cut the paper a half inch to an inch larger and fold the edges over (shown below right).


Step 4: Create your own piece of art...
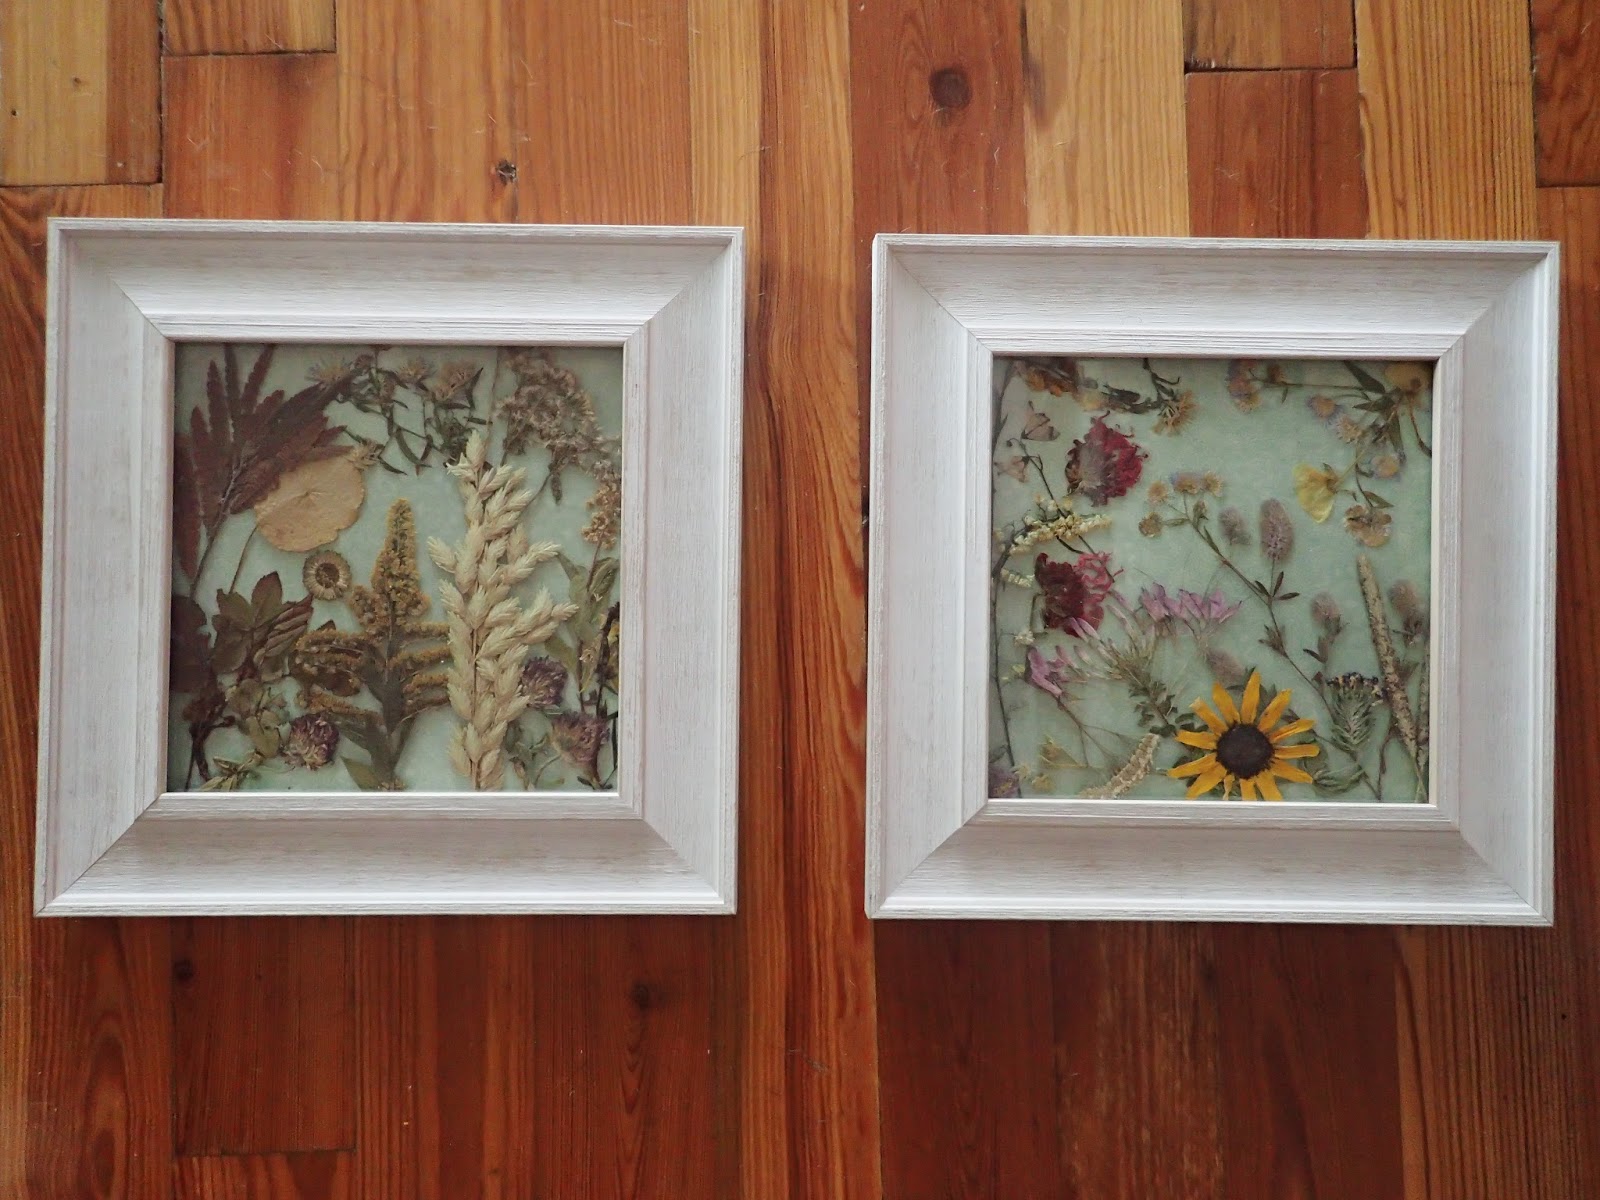
I decided to do a collage of pressed flowers using small amounts of super glue. Your flowers will be too heavy to use a simple craft spray adhesive. A super glue should do the trick (read the container for safety purposes). It's hard to go wrong with a collage... but if gluing the flowers down worries you. Practice first by laying the flowers down on your background how you like them. When you overlap the flowers a little, it's okay. You can cut the stems shorter if you want... it's your artwork. When you like what you've done, glue one flower down at a time. If they overlap, make sure to glue the one on the bottom first. To make sure your flowers are going to stay adhered, I recommend covering your work with the piece of glass or a paper towel and stacking books on top of it. Leave it stacked overnight so it will not fall apart. Minor repair may be needed the next day.

Step 5: Insert the finished product...
It is time to put it all together! The clean glass piece will go in the frame first (watch the edges... glass is fragile). Make sure you have located the top of your frame and insert your artwork into the frame. Take the paper backing you cut open and lay it back down on your work. This part is tricky and can be dangerous. If you have metal tabs that were bent away from the picture, bend them back down now with the screwdriver. If you do not have tabs, you can create them with a simple stapler (with extreme caution and/or supervision of course). With the paper backing down, insert the staple in the center of each side of the frame as shown below.

Step 6: You're done! Flip it over and find a spot to display your beautiful new piece of art!
See what else is going on at GreinerStudio.com.
No comments:
Post a Comment